
Introduction
A printable puzzle looks professional when the image is sharp, the size is right, and the paper matches the use case. This guide covers the three decisions that prevent most print mistakes.
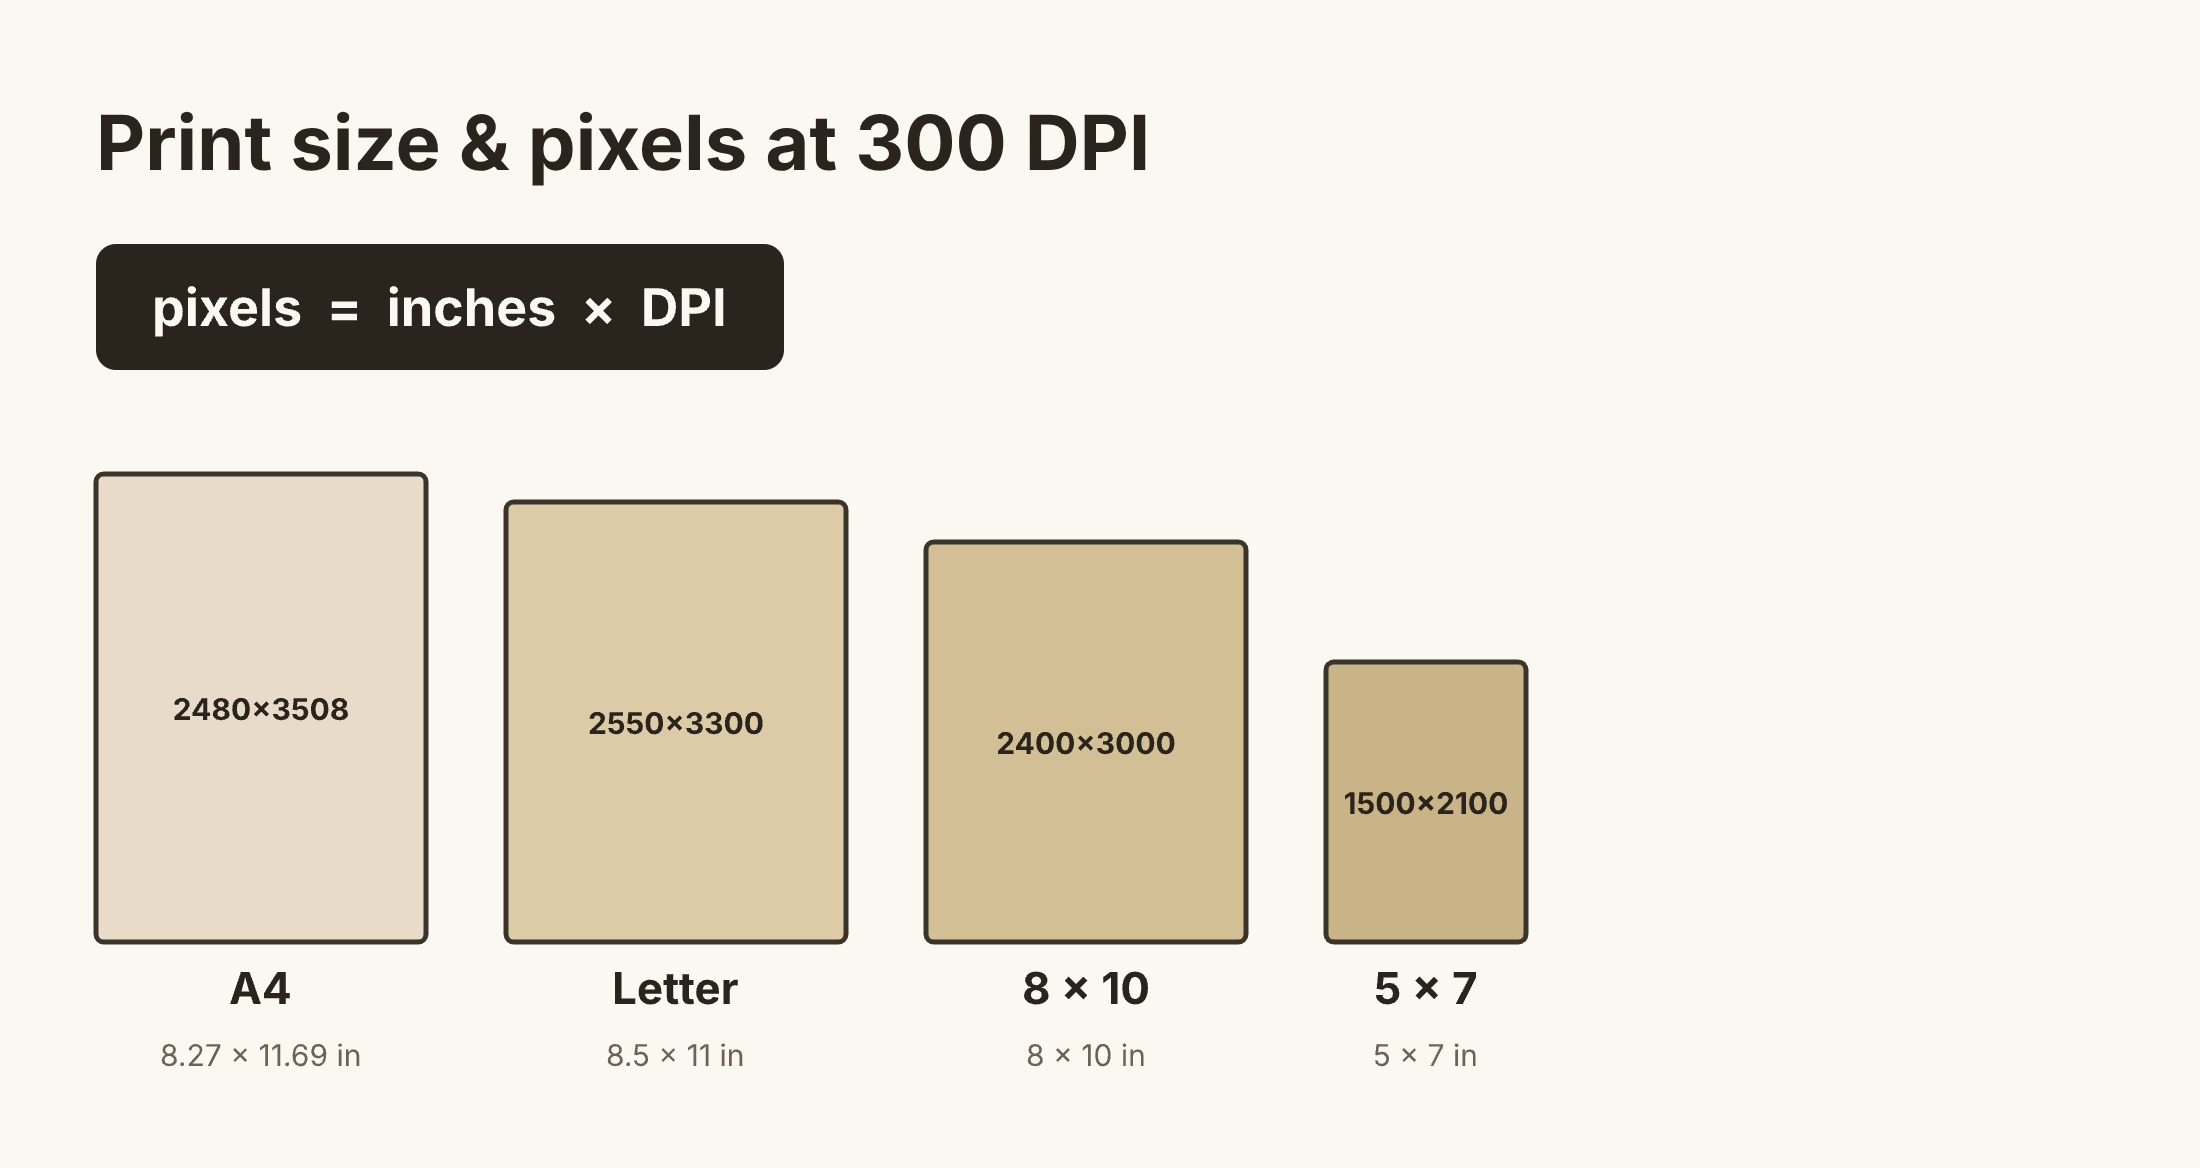
DPI in one sentence
DPI means dots per inch. For clean lines and readable detail, 300 DPI is the safe standard.
pixels = inches × DPISo a sharp Letter-size print needs about 2550 × 3300 pixels. Here are the common sizes:
| Size | Pixels (approx.) |
|---|---|
| Letter (8.5 × 11) | 2550 × 3300 |
| A4 (8.27 × 11.69) | 2480 × 3508 |
| 8 × 10 | 2400 × 3000 |
| 5 × 7 | 1500 × 2100 |
Decide the final print size before you resize the image. Resizing after the fact is the fastest way to lose sharpness. If your file is below the target pixels, choose a smaller print size rather than stretching it.
Match piece count to paper size
- Letter / A4: 20–60 pieces for quick activities
- A3: 60–120 pieces for longer play
- Small (5 × 7): fewer, larger pieces
Leave a 3–5 mm margin around the edge so cutting is clean and borderless printing doesn't trim important detail.
Choose the right paper
| Paper | Weight | Best for |
|---|---|---|
| Cardstock | 200–300 gsm | Durable keepsakes, classroom reuse |
| Standard paper | 80–120 gsm | Cheap, high-volume classroom sets |
| Matte finish | — | Less glare while solving |
| Glossy finish | — | Richer color, but reflects light |
Pick the finish based on where it'll be solved — matte for bright classroom lighting, glossy for a home table.
Print settings that matter
- Scale: 100% — never "fit to page" (the #1 reason pieces don't line up later)
- Quality: high or best
- Color: use your normal photo profile; turn off automatic "enhancement" if tones look unnatural
Image prep, in the right order
The order matters more than the edits themselves:
- Crop to the final ratio (Letter, A4, 5×7…)
- Correct exposure so highlights and shadows are both readable
- Sharpen lightly — only after resizing
- Check at 100% zoom to confirm fine detail isn't mushy
Prints come out slightly darker and less saturated than your screen, so a small brightness and saturation bump usually helps.
Test one before you print a batch
Print a single sample and check: are small details clear, are cut lines visible but not distracting, does the color look close to the source? Only run the full quantity after one good sample. For repeated runs, save your settings as a preset so quality stays consistent.
Quick troubleshooting
- Looks blurry: image is too small for your print size
- Edges look soft: compression is too high
- Pieces tear easily: paper is too thin — move to cardstock
- Colors look off: print a test page and adjust saturation before the full run


